


Setting Up the Country Table
The Country table includes information regarding the country in which your store(s) and your potential customers are located.
 If a country is marked as supported for a certain store, it cannot
be deleted from the Country table.
If a country is marked as supported for a certain store, it cannot
be deleted from the Country table.
To add a new country:
1. In the Presets view, click System Setup.
2. In the System Setup list, click Country.
The Country
page is displayed.
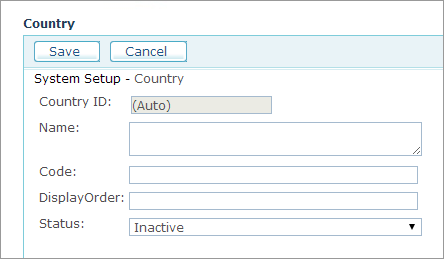
3. Fill in the following:
● Name: Country name.
● Code: Country code. For example, enter "US" for United States.
● Display Order: Unique number that will determine the location of this country in the relevant drop-down lists in the system (optional).
● Status: Select whether to activate this country table entry (Active) or deactivate it (Inactive). If the Status is set to Active, the country will be available for selection in the Supported Locations section of the Appearance tab in the Store Setup page (see Defining Supported Locations). If the country is already in use for a specific store, you cannot change its status to Inactive.
4. Click Save.
You should now add a localized text for each language that you want to use in your stores.
To add localized text for the required languages:
1. In the
Country list, click the Edit ![]() button of
the required language.
button of
the required language.
2. Click
the Edit Localized
Text button.
The Country Localization page
for the selected country table is displayed.
3. Click
Add New to
add a new localized text or Edit
![]() to edit an existing one.
to edit an existing one.
The selected table’s Localization
page is displayed.
4. In the Culture list, select the culture to which you are localizing.
5. Fill in the Name field in the local language.
6. Click Save to save your settings.