


Setting Up the Order Handling Status Table
The Order Handling Status table enables you to add queues to the Orders view (see Handling Orders).
To add an Order Handling Status action:
1. In the Presets view, click System Setup.
2. In the System Setup list, click Order Handling Status.
3. Click the Add New button.
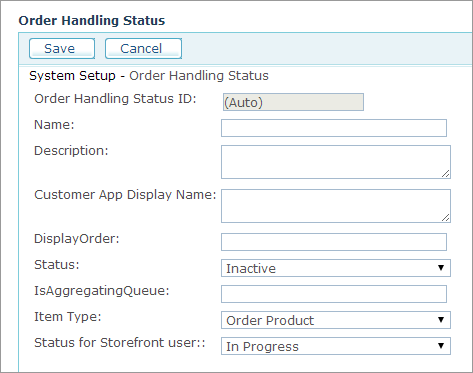
4. Fill in the following fields:
● Name: The name of the queue that is visible to the administrator in the Orders view.
● Description: Description of the queue.
● Customer App Display Name: The name of the queue to be displayed in the Order History page in the Storefront application.
Using different names for queues in the Back Office and the Storefront applications enables you to hide internal store procedures from customers.
For example, you can cluster several queues (for example, queues A, B and C) in the Back Office application to a unique Customer queue (for example, D). As a result, in the Order History page, customers will not be able to see the exact status of an order as it appears in the Back Office application (A, B, C); rather they will see the specific order status you have enabled (D).
● Display Order: Enter a unique number that will determine the location of this queue in the Queue list in the Orders view.
● Status: Select whether to activate this order queue (Active) or deactivate it (Inactive). Do not deactivate queues that contain orders.
5. Click Save.
See Also
Watch this video to learn
more about creating queues ![]()