


Adding New JDF Nodes
By default, uStore includes JDF nodes for several paper types, folding and color settings (color or grays ca le). These nodes are available when you set up JDF requirements in the Product Properties page.
If your job includes additional requirements, such as binding and imposition, you need to create additional JDF node sets.
To ensure that your product is printed according to the JDF specifications, make sure that you follow these steps:
1. Create the
required property in the Product
Properties page.
See Setting
Up Product Properties.
2. Create the
new JDF Node Set.
The JDF Node Set that you create is added to the list of options available
when you set up JDF requirements in the Product
Properties page. See Adding
New JDF Nodes.
3. Create the
new JDF Node.
See Setting Up JDF Nodes.
4. Assign the
required JDF Node set to the property options in the Product
Properties page.
See how to set up input controls for drop-down lists, radio buttons and
gallery list/grid view list in Setting
Up Customer Input Controls.
 You can only set up JDF nodes for the following customer input controls:
Drop-down lists, Radio buttons, Gallery list or grid view lists.
You can only set up JDF nodes for the following customer input controls:
Drop-down lists, Radio buttons, Gallery list or grid view lists.
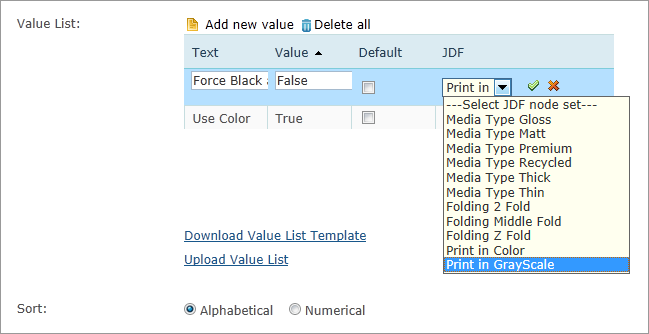
The following is the Product Properties page where you assign the required JDF Node set to a property:
To add new JDF node sets:
1. In the Presets view, click System Setup.
2. In the System Setup list, click JDF Node Set.
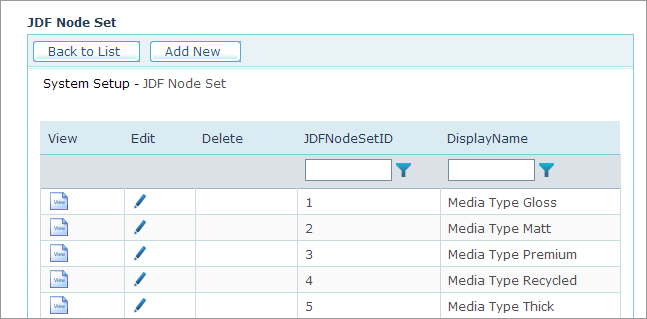
3. On the JDF Node Set page, click Add New.
4. In the Display Name box, enter a name for the node set. For example, if your product needs a 3-hole ring binding, enter RingBinding.
5. Click
Save.
The Node Set is added to the list and is available in the Product Properties
page when you set up customer input controls of the following types: Drop-down
lists, radio buttons, and gallery/grid view lists.
To make sure that uStore sends the correct information when it creates
the JDF file, you need to set up the JDF Node with the required XML code.